Thursday 15 August 2013

Creating a 3D Game With Three.js and WebGL

Prerequisites

  • A browser with WebGL - this game has been tested on Chrome and Firefox. IE still doesn’t support WebGL, unless you’re using Windows 8.1 with IE11.
  • Three.js library available for download from the Three.js website
  • The Keyboard.js helper library I used for this project, created by Arthur Schreiber at No Karma. Download it from my GitHub repository
  • A basic understanding of what Three.js does. Read this super simple, super quick tutorial by Paul Lewis. It’s basically a short-hand version of this article.

Setup

Get a base index.html running

Step one when making a web-based game is to create the host index.html file. In our case, it only needs to be a very simple set of elements, so we can bundle the CSS styling too.
12345678910111213141516171819202122232425262728293031323334353637383940414243444546
<!doctype html>
<html>
<head>
<title>Game</title>
<style>
body {
background-color: black;
}
#gameCanvas {
background-color: black;
width: 640px;
height: 360px;
margin: auto;
align: center;
}
#scoreboard {
text-align: center;
font-family: Segoe UI, Helvetica, Ubuntu, sans-serif;
color: white;
}
#scores {
font-size:600%;
padding:0;
margin:0;
color: white;
}
#title {
background-color: white;
color: black;
}
</style>
</head>
<body onload='setup();'>
<div id='gameCanvas'></div>
<script src='./Scripts/three.min.js'></script>
<script src='./Scripts/keyboard.js'></script>
<script src='./Scripts/game.js'></script>
<div id='scoreboard'>
<h1 id='scores'>0-0</h1>
<h1 id='title'>3D PONG</h1>
<h2 id='winnerBoard'>First to 7 wins!</h2>
<h3>A - move left
<br>D - move right</h3>
</div>
</body>
</html>
view rawBNG_Pong_index hosted with ❤ by GitHub

Import Keyboard.js and Three.js

Three.js is a library contained in just one JavaScript file, so we can grab the minified version from the website.
For Keyboard input, we will need to referencethe aforementioned JavaScript file in our index.html as well.

Create setup() and draw() functions

The setup() function will be the start point for the game code. The draw() function will be run every frame and will handle all the rendering and game logic.
123456789101112
function setup()
{
 
draw();
}
 
 
function draw()
{
 
requestAnimationFrame(draw);
}
view rawBNG_Pong_setup hosted with ❤ by GitHub
In order to loop the draw() function, we simply utilise the requestAnimationFrame() function call, and pass ‘draw’ as the parameter. Remember, not all browsers natively support the call, and you might have to use Paul Irish’s shim to gain maximum compatibility. Also, it is important to realise that requestAnimationFrame() does not guarantee a fixed frame-rate, so you need to use time-deltas to calculate realistic physics. For a basic game like Pong, we don’t really care about that.

Basic World

Set up the Three.js world and camera

Three.js includes these important elements:
  • Scene
  • Renderer
  • Camera
  • Mesh
  • Light
  • Material
Cameras, Meshes, and Lights need to be added to the scene using the scene.add() function.

Attach a WebGL Three.js Renderer to the DIV

The renderer is attached to whichever HTML DOM element you wish to render the scene to, and a render() call is made each frame to the renderer in order to draw the Three.js scene.
12345678910111213141516171819202122232425262728
// set the scene size
var WIDTH = 640,
HEIGHT = 360;
 
// create a WebGL renderer, camera
// and a scene
var renderer = new THREE.WebGLRenderer();
 
// start the renderer
renderer.setSize(WIDTH, HEIGHT);
 
// attach the render-supplied DOM element (the gameCanvas)
var c = document.getElementById("gameCanvas");
c.appendChild(renderer.domElement);
 
...
 
function draw()
{
// draw THREE.JS scene
renderer.render(scene, camera);
 
// loop the draw() function
requestAnimationFrame(draw);
 
// process game logic
...
}
view rawBNG_Pong_Renderer hosted with ❤ by GitHub

Add a camera to the scene

Three.js has the option to create Perspective and Orthographic cameras. For most uses, Perspective camera is the best choice. We can change position and rotation information of the camera like any other object in the scene.
1234567891011121314
camera = new THREE.PerspectiveCamera(
VIEW_ANGLE,
ASPECT,
NEAR,
FAR);
 
scene = new THREE.Scene();
 
// add the camera to the scene
scene.add(camera);
 
// set a default position for the camera
// not doing this somehow messes up shadow rendering
camera.position.z = 320;
view rawBNG_Pong_camera hosted with ❤ by GitHub

Draw a sphere and light it

Meshes must be paired with Materials in order to give them a defined look and feel. Meshes can be of many types, include primitives such as Cube, Sphere, Plane and Torus. Materials can have different characteristics depending on their type. The basic Material types include Lambert, Phong, and Basic.
  • Basic renders an unlit Mesh with no shadows or dark shading. A sphere will look like a circle if rendered with Basic.
  • Lambert is a simple diffuse-like lighting that creates shading on sides facing away from a light source. It gives a basic 3D look of surfaces that are matte (non-shiny and non-reflective)
  • Phong is used for achieving a plastic-like look and feel, with the ability to gain highlights that give a much shinier appearance to the Mesh.
Create a basic sphere with a Lambert material with the following code:
1234567891011121314151617181920212223242526
// ---------------------------------
// Based on Aerotwist's cool tutorial - http://www.aerotwist.com/tutorials/getting-started-with-three-js/
// ---------------------------------
 
// set up the sphere vars
// lower 'segment' and 'ring' values will increase performance
var radius = 5,
segments = 6,
rings = 6;
 
// create the sphere's material
var sphereMaterial =
new THREE.MeshLambertMaterial(
{
color: 0xD43001
});
 
// Create a ball with sphere geometry
var ball = new THREE.Mesh(
new THREE.SphereGeometry(radius,
segments,
rings),
sphereMaterial);
 
// add the sphere to the scene
scene.add(ball);
view rawBNG_Pong_basicsphere hosted with ❤ by GitHub
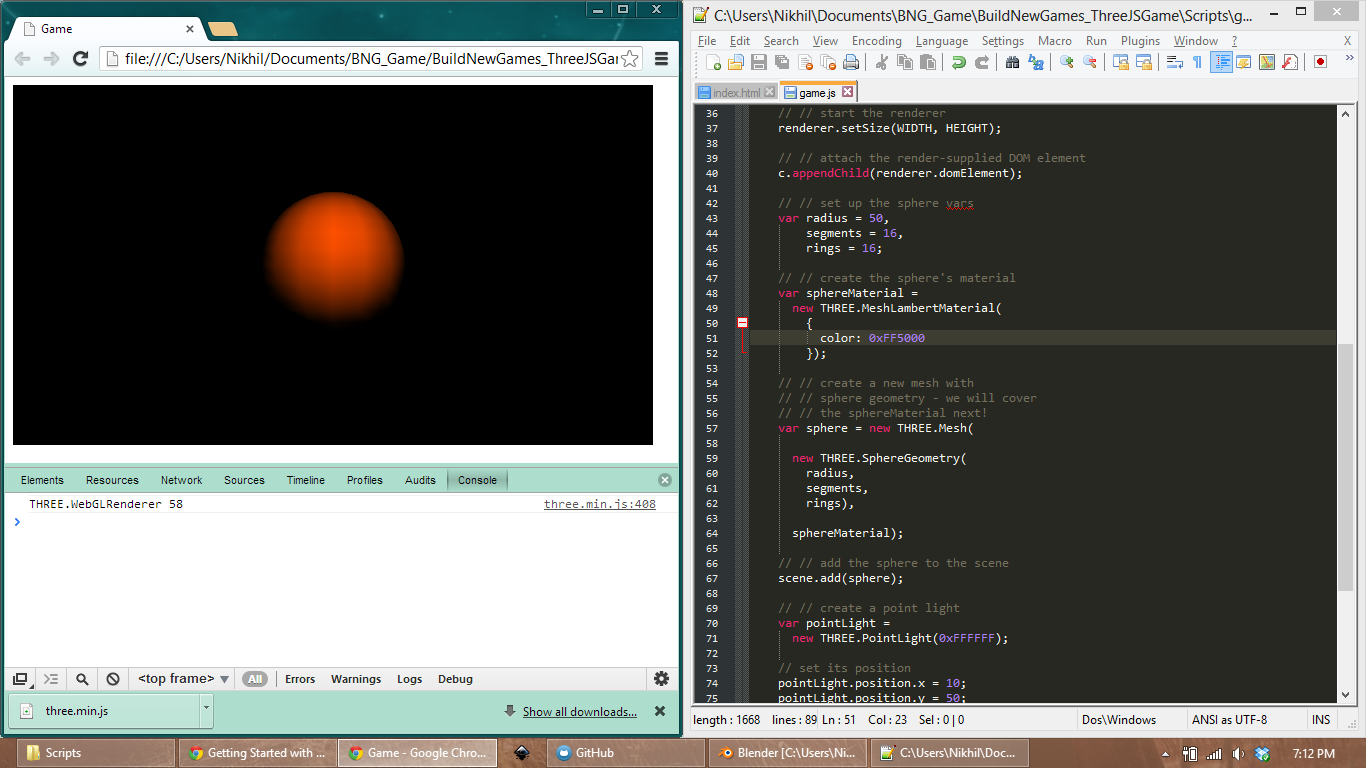
Show off your sphere with a Point Light. This is the most basic light, with no direction or rotation. Make sure you tweak the light’s intensity and distance to get it looking good.
123456789101112
// // create a point light
pointLight = new THREE.PointLight(0xF8D898);
 
// set its position
pointLight.position.x = -1000;
pointLight.position.y = 0;
pointLight.position.z = 1000;
pointLight.intensity = 2.9;
pointLight.distance = 10000;
 
// add to the scene
scene.add(pointLight);
view rawBNG_Pong_pointlight hosted with ❤ by GitHub

Add Game Objects

Draw playing area plane

The playing area will be a Three.js Mesh object of type Plane. Make sure the plane matches the play area, giving a small buffer gap to indicate where the paddles can and can’t go.
1234567891011121314151617
// create the plane's material
var planeMaterial =
new THREE.MeshLambertMaterial(
{
color: 0x4BD121
});
 
// create the playing surface plane
var plane = new THREE.Mesh(
new THREE.PlaneGeometry(
planeWidth * 0.95, // 95% of table width, since we want to show where the ball goes out-of-bounds
planeHeight,
planeQuality,
planeQuality),
planeMaterial);
 
scene.add(plane);
view rawBNG_Pong_plane hosted with ❤ by GitHub

Draw paddles

The paddles will be Mesh objects of type Cube. Position each of the paddles on opposite sides of the play area.
1234567891011121314151617181920212223242526272829303132333435363738394041
// set up the paddle vars
paddleWidth = 10;
paddleHeight = 30;
paddleDepth = 10;
paddleQuality = 1;
 
// set up paddle 1
paddle1 = new THREE.Mesh(
new THREE.CubeGeometry(
paddleWidth,
paddleHeight,
paddleDepth,
paddleQuality,
paddleQuality,
paddleQuality),
paddle1Material);
 
// add the paddle to the scene
scene.add(paddle1);
 
// Set up the second paddle
paddle2 = new THREE.Mesh(
new THREE.CubeGeometry(
paddleWidth,
paddleHeight,
paddleDepth,
paddleQuality,
paddleQuality,
paddleQuality),
paddle2Material);
 
// Add the second paddle to the scene
scene.add(paddle2);
 
// set paddles on each side of the table
paddle1.position.x = -fieldWidth/2 + paddleWidth;
paddle2.position.x = fieldWidth/2 - paddleWidth;
 
// lift paddles over playing surface
paddle1.position.z = paddleDepth;
paddle2.position.z = paddleDepth;
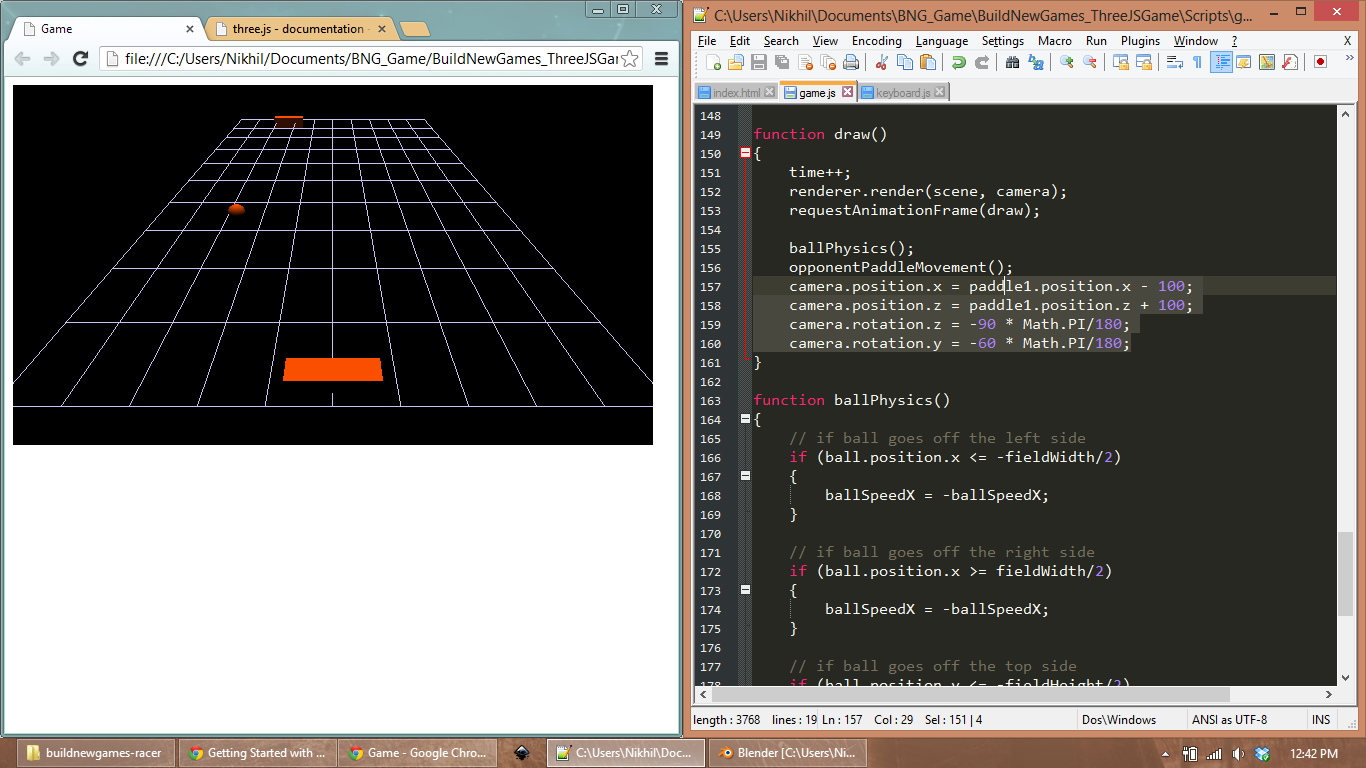
If you manipulate the camera positions, as seen in the screenshot, you can give a different perspective to the player.

Basic Logic

Ball movement

The ball will have an X-direction and a Y-direction that determines the movement per frame.
12
// ball's x-direction, y-direction and speed per frame
var ballDirX = 1, ballDirY = 1, ballSpeed = 2;
view rawBNG_Pong_ballvars hosted with ❤ by GitHub
The ball will move at a constant speed in the X-plane every frame. To this end, we will specify a ballSpeed variable that acts as a multiplier for the direction values.
123
// update ball position over time
ball.position.x += ballDirX * ballSpeed;
ball.position.y += ballDirY * ballSpeed;
view rawBNG_Pong_ballMove hosted with ❤ by GitHub
We want the ball to have some unpredictable characteristics (e.g. when it gets sliced quite hard) so we will allow the Y-direction to go up to a maximum of ballSpeed * 2. You can tweak the values until you’re happy with how the ball behaves.
1234567891011
// limit ball's y-speed to 2x the x-speed
// this is so the ball doesn't speed from left to right super fast
// keeps game playable for humans
if (ballDirY > ballSpeed * 2)
{
ballDirY = ballSpeed * 2;
}
else if (ballDirY < -ballSpeed * 2)
{
ballDirY = -ballSpeed * 2;
}

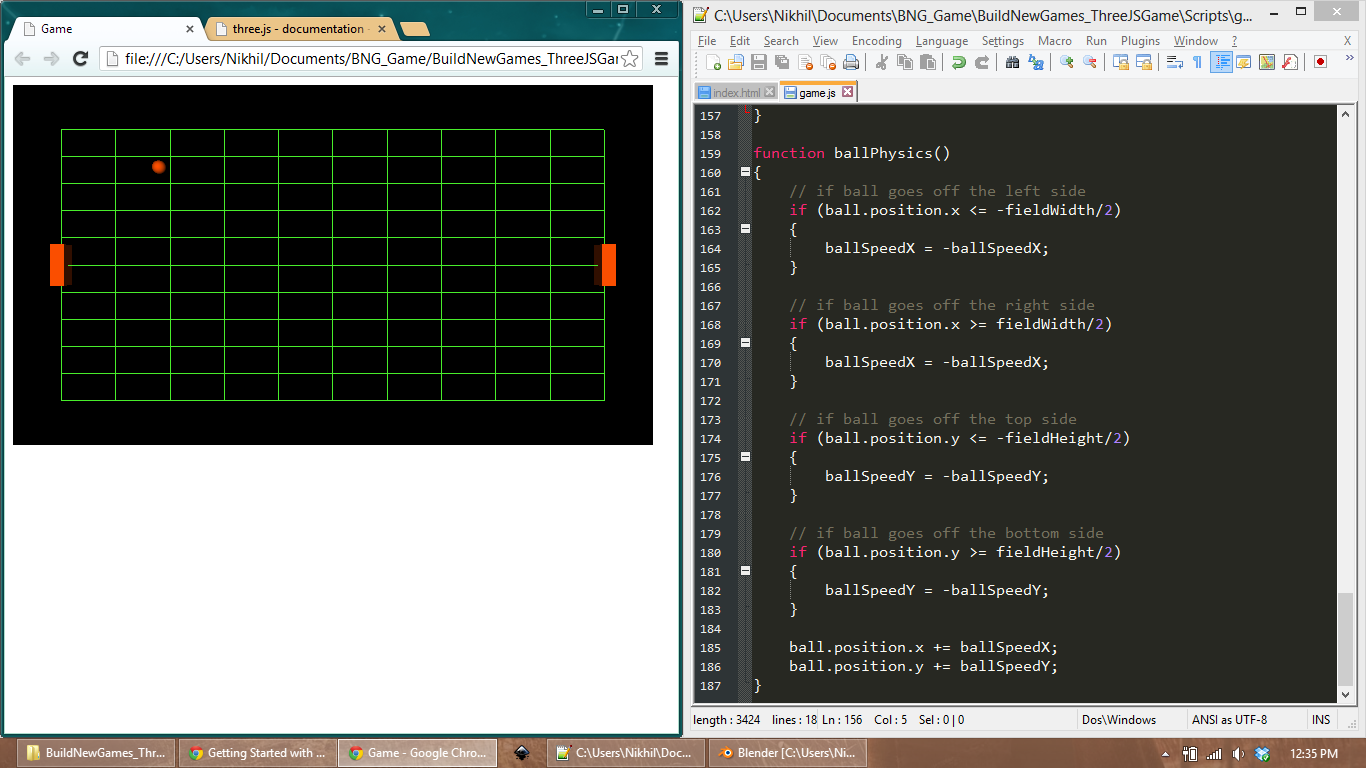
Ball wall bounce logic

Simple collision detection logic is required to check if the ball is touching each of the side ‘walls’. Using a series of ‘if-else’ statements, we check the ball positions against the predetermined wall positions. In the case of a collision, we simply switch the Y-direction of the ball, creating a bounce effect.
1234567891011
// if ball goes off the top side (side of table)
if (ball.position.y <= -fieldHeight/2)
{
ballDirY = -ballDirY;
}
 
// if ball goes off the bottom side (side of table)
if (ball.position.y >= fieldHeight/2)
{
ballDirY = -ballDirY;
}
view rawBNG_Pong_wallcoll hosted with ❤ by GitHub
Later, we will edit some of this code in order to implement scoring when the ball passes a paddle.

Keyboard input for paddles

We will utilise a very effective short-cut in order to easily get keyboard input working in this game. Using the Keyboard.js file provided, we simply have to include the reference to it in the index.html file and we are set. Only one function call is required, the Key.isDown() call. Given a parameter, the library checks if that particular key is current being pressed, and returns a boolean value.
123456
// move left
if (Key.isDown(Key.A))
{
// code to move paddle left
}
view rawBNG_Pong_keyboard hosted with ❤ by GitHub
We use the ‘A’ and ‘D’ keys to move the paddle left and right, but you can edit the Keyboard.js with additional values if you want to use your own control scheme.
1234567891011121314151617
...
 
var Key = {
_pressed: {},
 
A: 65,
W: 87,
D: 68,
S: 83,
// add your required key code (ASCII) along with the name here
// for example:
 
SPACE: 32,
 
...
};
view rawBNG_Pong_keyboardAdd hosted with ❤ by GitHub
While dealing with keyboard input, it is also important to ensure that the input is never blindly updated in game. We have to check that the paddle isn’t made to move off the play area, and we do that with some ‘if-else’ statements as well.
1234567891011121314151617
// move left
if (Key.isDown(Key.A))
{
// if paddle is not touching the side of table
// we move
if (paddle1.position.y < fieldHeight * 0.45)
{
paddle1DirY = paddleSpeed * 0.5;
}
// else we don't move and stretch the paddle
// to indicate we can't move
else
{
paddle1DirY = 0;
paddle1.scale.z += (10 - paddle1.scale.z) * 0.2;
}
}
Note that we use a paddle direction variable, rather than simply applying a change to the position values. This will come in handy when programming the ball to ‘slice’ when hit at an angle with a fast-moving paddle.

Opponent logic

When you code a game of this calibre, it is of utmost importance that you create a vivid, lush environment with a host of emotional, highly-relatable characters that showcase this generation’s strides forward in technology. Instead, we will code a Pong A.I. that blindly follows the ball, because that is even better.
12
// Lerp towards the ball on the y plane
paddle2DirY = (ball.position.y - paddle2.position.y) * difficulty;
view rawBNG_Pong_lerp hosted with ❤ by GitHub
We can update the opponent difficulty by using a variable instead of introducing magic numbers. This variable will affect the ‘reaction rate’ of the opponent by increasing the Lerp (Linear-Interpolation) time.
When using a Lerp (Linear-Interpolation) function, we must ensure the opponent plays fairly by limiting their maximum travel speed. We do that with a few more if-else statements.
12345678910111213141516171819
// in case the Lerp function produces a value above max paddle speed, we clamp it
if (Math.abs(paddle2DirY) <= paddleSpeed)
{
paddle2.position.y += paddle2DirY;
}
// if the lerp value is too high, we have to limit speed to paddleSpeed
else
{
// if paddle is lerping in +ve direction
if (paddle2DirY > paddleSpeed)
{
paddle2.position.y += paddleSpeed;
}
// if paddle is lerping in -ve direction
else if (paddle2DirY < -paddleSpeed)
{
paddle2.position.y -= paddleSpeed;
}
}
view rawBNG_Pong_LerpLimit hosted with ❤ by GitHub
If want to extend immersion, you could also using the paddle.scale property to stretch the paddle when it can’t be moved. This indicates an issue to the player which they can then address immediately. In order to accomplish this, we must ensure the paddle always Lerps back to the default scale size.
123456
// We lerp the scale back to 1
// this is done because we stretch the paddle at some points
// stretching is done when paddle touches side of table and when paddle hits ball
// by doing this here, we ensure paddle always comes back to default size
 
paddle2.scale.y += (1 - paddle2.scale.y) * 0.2;

Adding Gameplay

Making the ball reset after missing a paddle

To get the main scoring gameplay working, we need to first remove the ball’s ability to bonce off the paddle-facing walls. To do this, we remove the bounce code from the two corresponding if-else statements.
12345678910111213141516171819202122232425262728293031
// if ball goes off the top side (side of table)
if (ball.position.y <= -fieldHeight/2)
{
ballDirY = -ballDirY;
}
 
// if ball goes off the bottom side (side of table)
if (ball.position.y >= fieldHeight/2)
{
ballDirY = -ballDirY;
}
 
//// --------------------------------- ////
CHANGED CODE
//// --------------------------------- ////
 
// if ball goes off the 'left' side (Player's side)
if (ball.position.x <= -fieldWidth/2)
{
// CPU scores a point
// update scoreboard
// and reset ball
}
 
// if ball goes off the 'right' side (CPU's side)
if (ball.position.x >= fieldWidth/2)
{
// player scores a point
// update scoreboard
// and reset ball
}
We can handle scoring in many different ways. For a simple game like this, we can simply increment the corresponding score count variable.
123456789101112131415
// if ball goes off the 'left' side (Player's side)
if (ball.position.x <= -fieldWidth/2)
{
// CPU scores
score2++;
// update scoreboard HTML
document.getElementById("scores").innerHTML = score1 + "-" + score2;
// reset ball to center
resetBall(2);
// check if match over (someone scored maxScore points)
matchScoreCheck();
}
view rawBNG_Pong_scoring hosted with ❤ by GitHub
We can then update the HUD element in the DOM by setting its innerHTML value. Finally, we have to reset the ball once someone has scored. A simple function can be written to reset the ball, with a parameter indicating which paddle just lost (so we know which paddle to send the ball to next time).
1234567891011121314151617181920212223
// resets the ball's position to the centre of the play area
// also sets the ball direction speed towards the last point winner
 
function resetBall(loser)
{
// position the ball in the center of the table
ball.position.x = 0;
ball.position.y = 0;
// if player lost the last point, we send the ball to opponent
if (loser == 1)
{
ballDirX = -1;
}
// else if opponent lost, we send ball to player
else
{
ballDirX = 1;
}
// set the ball to move +ve in y plane (towards left from the camera)
ballDirY = 1;
}
view rawBNG_Pong_resetBall hosted with ❤ by GitHub

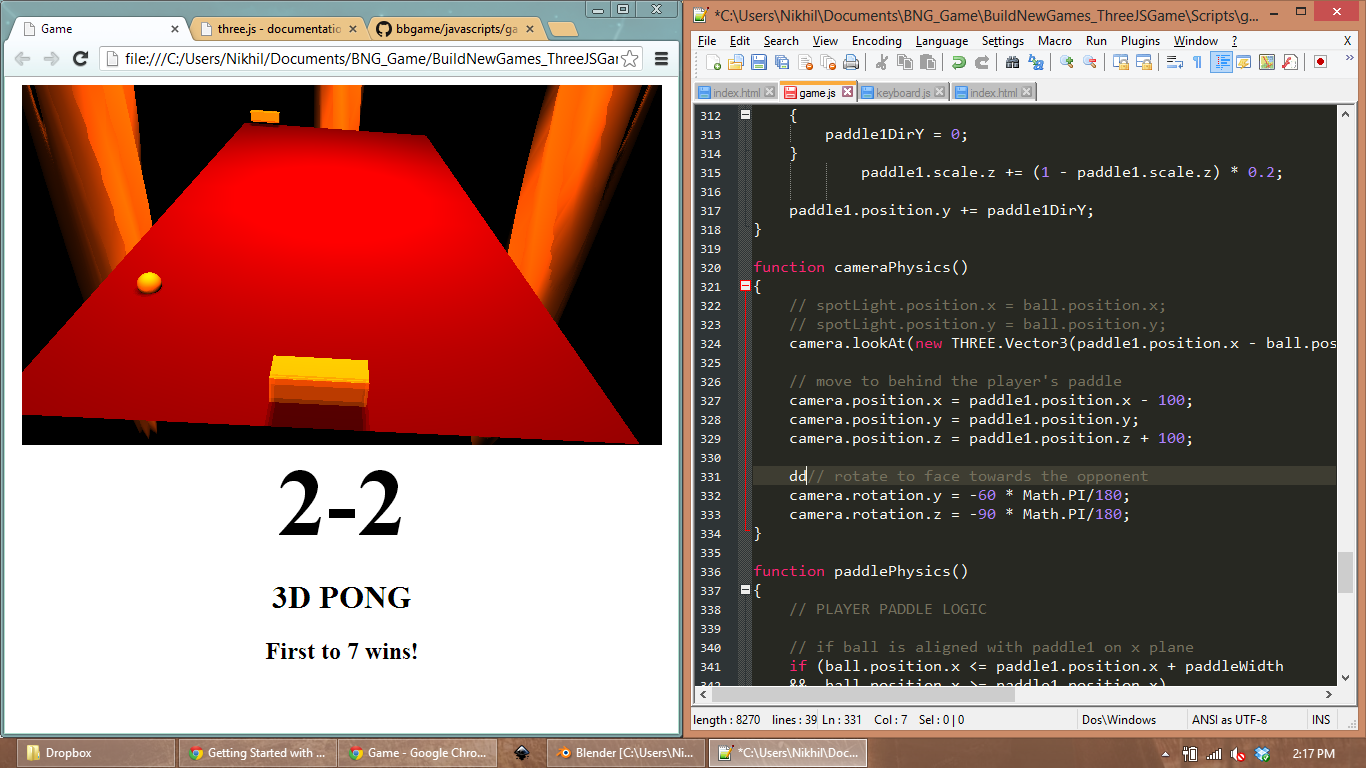
Making the ball bounce off paddles

Alright, this is it. The big one. Literally the biggest feature of this game. It’s time to get the paddles hitting the ball. In a simple Pong game, paddle-ball physics are nothing more than a couple of if-else statements. We check the X-position and Y-position of the ball against the paddle’s rectangular bounds, and if they intersect, we bounce the ball away.
123456789101112131415
// if ball is aligned with paddle1 on x plane
// remember the position is the CENTER of the object
// we only check between the front and the middle of the paddle (one-way collision)
 
if (ball.position.x <= paddle1.position.x + paddleWidth
&& ball.position.x >= paddle1.position.x)
{
// and if ball is aligned with paddle1 on y plane
 
if (ball.position.y <= paddle1.position.y + paddleHeight/2
&& ball.position.y >= paddle1.position.y - paddleHeight/2)
{
// ball is intersecting with the front half of the paddle
}
}
view rawBNG_Pong_paddlecoll1 hosted with ❤ by GitHub
It’s also important to check the direction of the ball’s travel, as we only want to check collisions in one direction (the direction towards the opponent.)
1234567891011121314
// and if ball is travelling towards player (-ve direction)
if (ballDirX < 0)
{
// stretch the paddle to indicate a hit
paddle1.scale.y = 15;
 
// switch direction of ball travel to create bounce
ballDirX = -ballDirX;
 
// we impact ball angle when hitting it
// this is not realistic physics, just spices up the gameplay
// allows you to 'slice' the ball to beat the opponent
ballDirY -= paddle1DirY * 0.7;
}
view rawBNG_Pong_ballcoll2 hosted with ❤ by GitHub
We will also affect the ball’s lateral movement depending on the relative speed of the paddle when hitting the ball. This is particularly useful in introducing the biggest variable in Pong: the slice. Slicing the ball is often the only way to confuse and outmaneuver the opponent, so it is vital in this game.
Remember to duplicate the code, but update the values to match the opponent’s paddle. You can use this opportunity to gimp your opponent’s ability somewhat, by reducing the hitbox size or decreasing the slice amount. It’s what we would all do.
Here is the final paddle-ball collision function:
123456789101112131415161718192021222324252627282930313233343536373839404142434445464748495051525354555657
// Handles paddle collision logic
function paddlePhysics()
{
// PLAYER PADDLE LOGIC
 
// if ball is aligned with paddle1 on x plane
// remember the position is the CENTER of the object
// we only check between the front and the middle of the paddle (one-way collision)
if (ball.position.x <= paddle1.position.x + paddleWidth
&& ball.position.x >= paddle1.position.x)
{
// and if ball is aligned with paddle1 on y plane
if (ball.position.y <= paddle1.position.y + paddleHeight/2
&& ball.position.y >= paddle1.position.y - paddleHeight/2)
{
// and if ball is travelling towards player (-ve direction)
if (ballDirX < 0)
{
// stretch the paddle to indicate a hit
paddle1.scale.y = 15;
// switch direction of ball travel to create bounce
ballDirX = -ballDirX;
// we impact ball angle when hitting it
// this is not realistic physics, just spices up the gameplay
// allows you to 'slice' the ball to beat the opponent
ballDirY -= paddle1DirY * 0.7;
}
}
}
 
// OPPONENT PADDLE LOGIC
 
// if ball is aligned with paddle2 on x plane
// remember the position is the CENTER of the object
// we only check between the front and the middle of the paddle (one-way collision)
if (ball.position.x <= paddle2.position.x + paddleWidth
&& ball.position.x >= paddle2.position.x)
{
// and if ball is aligned with paddle2 on y plane
if (ball.position.y <= paddle2.position.y + paddleHeight/2
&& ball.position.y >= paddle2.position.y - paddleHeight/2)
{
// and if ball is travelling towards opponent (+ve direction)
if (ballDirX > 0)
{
// stretch the paddle to indicate a hit
paddle2.scale.y = 15;
// switch direction of ball travel to create bounce
ballDirX = -ballDirX;
// we impact ball angle when hitting it
// this is not realistic physics, just spices up the gameplay
// allows you to 'slice' the ball to beat the opponent
ballDirY -= paddle2DirY * 0.7;
}
}
}
}

Scoring

In Pong, it is usually simplest to have a maximum score value, such that a game is won when either player reaches that score. To that end, we can easily create a maxScore variable and set it at the start of the match.
12345
// game-related variables
var score1 = 0, score2 = 0;
 
// you can change this to any positive whole number
var maxScore = 7;
view rawBNG_Pong_scoreVar hosted with ❤ by GitHub
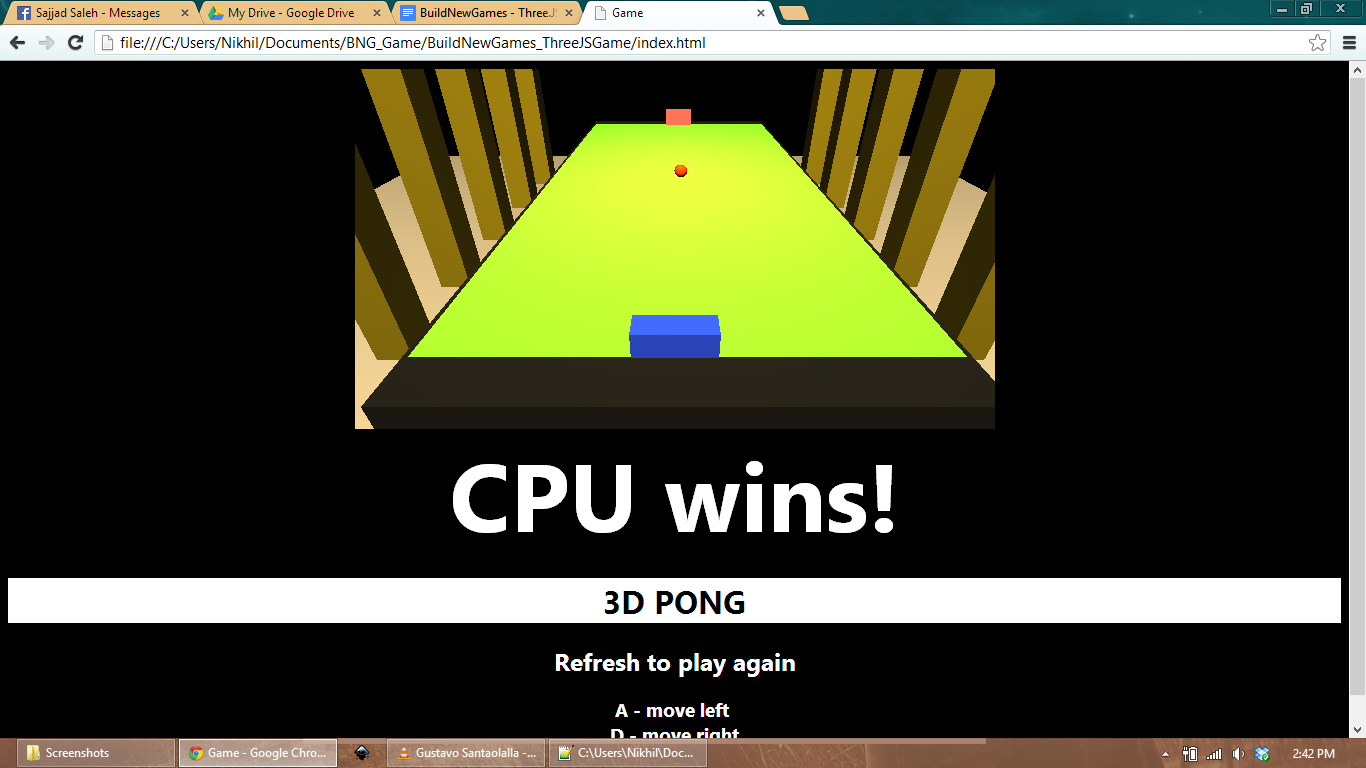
We then create a function to check if either player has scored equal or higher than the maximum. This function should be called only when a score has been changed (i.e. when someone scores a point.)
12345678910111213141516171819202122
// checks if either player or opponent has reached 7 points
function matchScoreCheck()
{
// if player has 7 points
if (score1 >= maxScore)
{
// stop the ball
ballSpeed = 0;
// write to the banner
document.getElementById("scores").innerHTML = "Player wins!";
document.getElementById("winnerBoard").innerHTML = "Refresh to play again";
}
// else if opponent has 7 points
else if (score2 >= maxScore)
{
// stop the ball
ballSpeed = 0;
// write to the banner
document.getElementById("scores").innerHTML = "CPU wins!";
document.getElementById("winnerBoard").innerHTML = "Refresh to play again";
}
}
After a match is deemed complete, it is simplest to just return the ball to the centre and stop any movement, so that play doesnt inadvertently continue.

Prettifying the Game

HUD

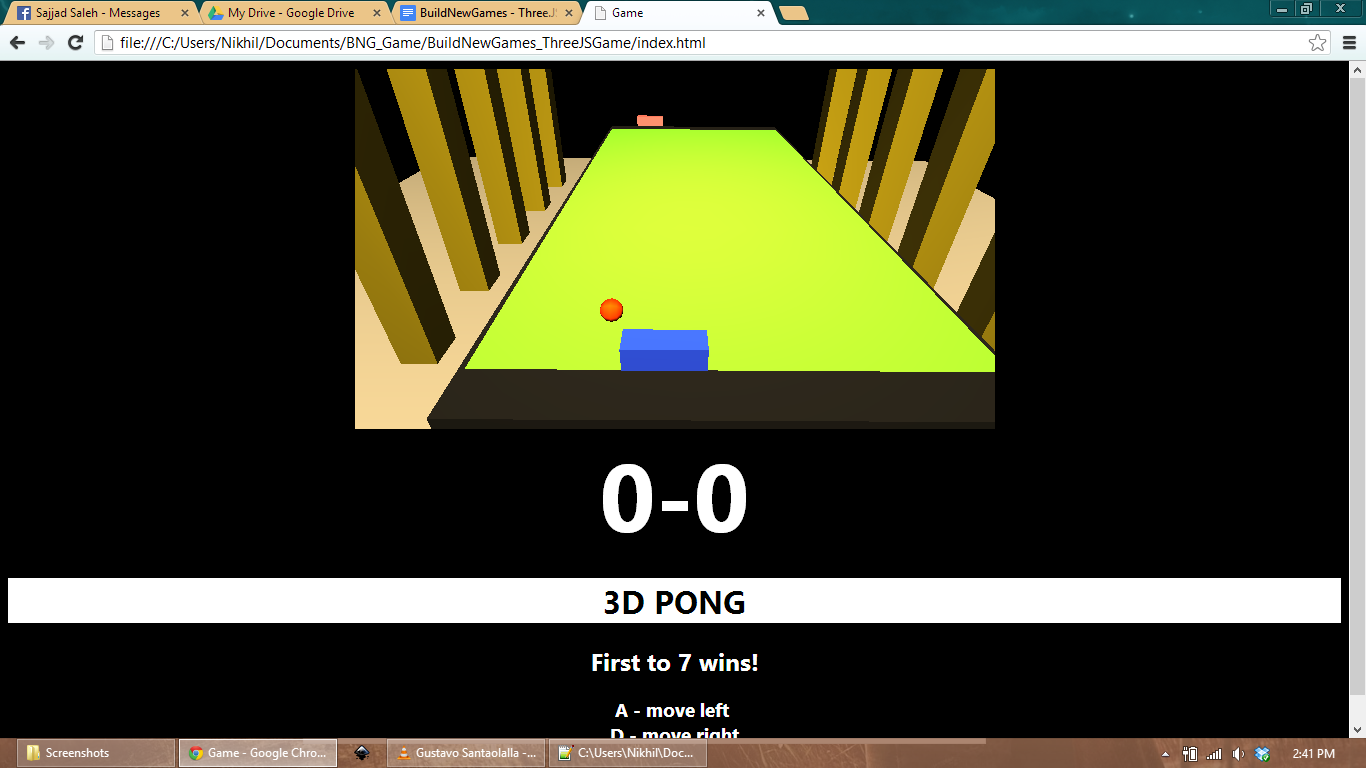
It’s important to give feedback to the player so they know what’s going on. For Pong, the least we can do is keep a scoreboard ticking over. Instead of trying to draw the HUD on the same layer as the game, we can use the other DOM elements to provide the required feedback.
It’s also good to indicate the maximum score as well, so we have another element for that which we will update at match start.
12
// update the board to reflect the max score for match win
document.getElementById("winnerBoard").innerHTML = "First to " + maxScore + " wins!";
view rawBNG_Pong_maxScoreDOM hosted with ❤ by GitHub

Shadows

Finally, it is time to make things look a tad more polished. Three.js has the awesome ability to create shadows for primitive objects (Cube, Plane, Sphere, etc.) so we can utilise that to make the game look nicer.
Shadows can’t be created with just a Point light, so we have to add a DirectionalLight or a SpotLight. A SpotLight shines a circular beam of light onto surfaces, which DirectionalLight simply shines a light in a certain direction with no regard to positioning.
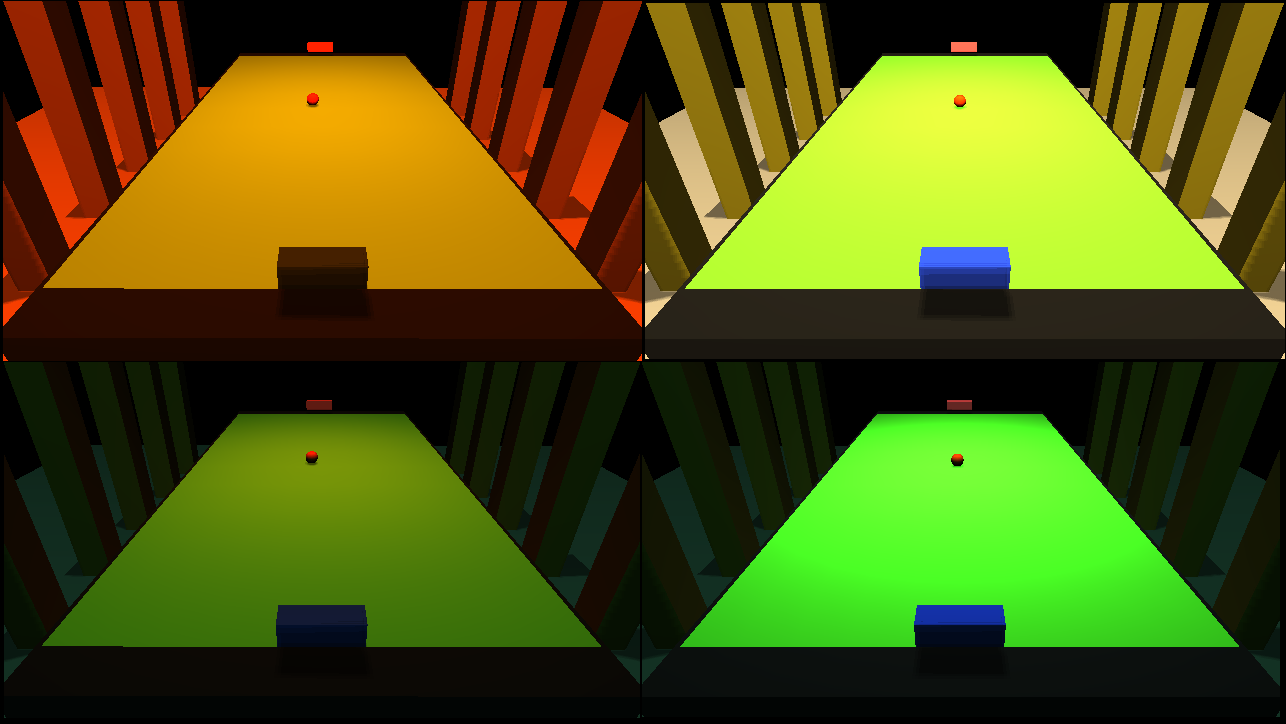
We will use a SpotLight because it clearly indicates where the light originates from and shines towards.
123456789101112131415161718192021
// create a point light
pointLight = new THREE.PointLight(0xF8D898);
 
// set its position
pointLight.position.x = -1000;
pointLight.position.y = 0;
pointLight.position.z = 1000;
pointLight.intensity = 2.9;
pointLight.distance = 10000;
scene.add(pointLight);
 
// add a spot light
// this is important for casting shadows
spotLight = new THREE.SpotLight(0xF8D898);
spotLight.position.set(0, 0, 460);
spotLight.intensity = 1.5;
spotLight.castShadow = true;
scene.add(spotLight);
 
// MAGIC SHADOW CREATOR DELUXE EDITION with Lights PackTM DLC
renderer.shadowMapEnabled = true;
view rawBNG_Pong_lights hosted with ❤ by GitHub
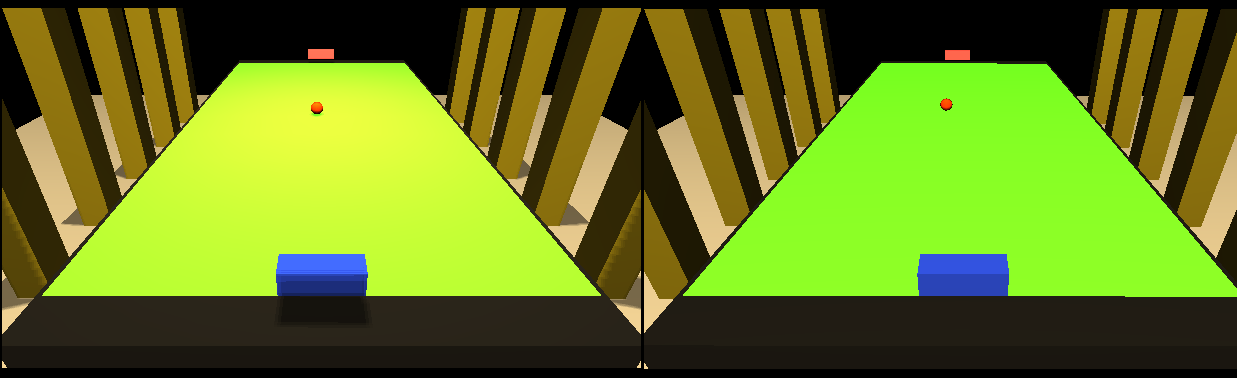
We can update the SpotLight to follow the ball around to give a more dynamic look and feel to the game, whilst showcasing the hard work we just put into the lighting.
123
// we can easily notice shadows if we dynamically move lights during the game
spotLight.position.x = ball.position.x;
spotLight.position.y = ball.position.y;
To make an object in the scene cast or receive shadows, we simply set their .receiveShadow and .castShadow variables to true. For example,
123456789
paddle1 = new THREE.Mesh(
new THREE.CubeGeometry(paddleWidth, paddleHeight, paddleDepth, paddleQuality, paddleQuality, paddleQuality),
paddle1Material);
 
// add the sphere to the scene
scene.add(paddle1);
 
paddle1.receiveShadow = true;
paddle1.castShadow = true;

Conclusion

This is but a basic introduction to the power of Three.js, which should allow you to create a basic Pong clone.
Play the latest build of this game here: LATEST BUILD*
Find the latest code at its GitHub page*
You can still do quite a number of things to polish your game, such as
  • Create animations for the paddles and ball
  • Update the HUD to look prettier
  • Import complex objects created in Modeling packages, to design a more immersive environment
  • Move HUD elements inside the game view to allow for full-screen gaming
  • Mess around with complex shaders to create reflections and other cool effects
Make sure you check out the Three.js homepage to discover more innovative examples of WebGL.