walkthrough on how to create and deploy a basic site with node.js and the Express framework
What we are going to do
This walkthrough will go over setting up a basic site using node.js and Express. The walkthrough is aimed at beginners exploring node.js as I've had many questions from friends and colleagues about creating and deploying node apps. If you are not a beginner the article probably won't be of much use to you. We are going to use express, an excellent web framework for node created by TJ Holowaychuk who seems to be pumping out node.js libraries like he was ten men.
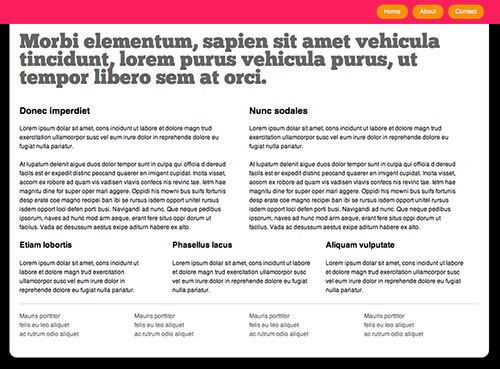
Here is the site we are going to create. You might also want to grab the source code.
Setup
First we need to setup our development environment. If you are on OSX I'vecovered how to setup node.js and npm on OSX in a previous article. If you haven't got everything installed follow that article.
If you are on Linux there are plenty of articles on Google.
For Windows users there are also resources on Google but it is a bit more tricky.
Prerequisites
If everything has installed ok you should now have node.js and npm running on your machine. At the terminal type
node -v and npm -v and you should see something like:node -v
v0.8.21
npm -v
1.2.12Create an Express site
Still with me? We've covered a lot already! Now let's create an Express site.
First let's install express
npm install -g express
The
-g flag means that you are installing express globally on your system.
Now we can create an express application.
express -c stylus express_example
The
-c states that we want to use stylus for css. You should see the following output:create : express_example
create : express_example/package.json
create : express_example/app.js
create : express_example/public
create : express_example/public/javascripts
create : express_example/public/images
create : express_example/public/stylesheets
create : express_example/public/stylesheets/style.styl
create : express_example/routes
create : express_example/routes/index.js
create : express_example/routes/user.js
create : express_example/views
create : express_example/views/layout.jade
create : express_example/views/index.jade
install dependencies:
$ cd express_example && npm install
run the app:
$ node app
As per the instructions you'll need to install dependencies so do this
cd express_example && npm install
This will install packages and you will see a lot of output. When this is complete you can boot your application.
Boot the app
That's all the setup you need. Phew. Now you can boot the app:
node app.js
You should see
Express server listening on port 3000 and if you open http://127.0.0.1:3000 you'll see the default Express page.Using Git
Git is a version control system that is used heavily in the node.js ecosystem, particulary with Github. If you aren't familiar with Git Scott Chacon is your go-to man. He's written extensively and eloquently on Git for beginners and experts. Checkout Gitcasts for if you are a beginner and ProGit for more advanced stuff. We are going to use git to version our site and publish it so let's set up our repo now. If your Express server is still running hit CTRL + C to stop it.
git init
git add .
git commit -m 'initial commit'
Developing node.js sites
Normally when you develop a node.js site you'll need ot restart your application each time you make a change. Thankfully our home-grown British JavaScript genius Remy Sharp has solved this problem with nodemon. Nodemon will reload your application each time it changes so you don't need to restart it. If you have used Shotgun for Ruby with Sinatra it is similar to that. To install run
npm install -g nodemon
Then you can start your app with
nodemon app.js
Using nodemon means you don't have to restart your app each time you make a change. For more infomation on nodemon see the README
HTML in Express
Express is agnostic as to which templating language you use. Templating languages can be a hot topic of debate but for this article I'm going to use jade. If you've used haml it is similar to that. In the example we use jade to setup a layout template.
!!! 5
html
  head
    title= title
    link(rel='stylesheet', href='/stylesheets/style.css')
    link(rel='stylesheet', href='/stylesheets/chunkfive-fontface.css')
  body
    header
      nav
        ul
          li
            a(href="/") Home
          li
            a(href="/about") About
          li
            a(href="/contact") Contact
    section#wrapper!= body
        footer
          section.css-table
            section.four-column
              section.cell
                p Mauris porttitor <br />felis eu leo aliquet<br /> ac rutrum odio aliquet
              section.cell
                p Mauris porttitor <br />felis eu leo aliquet<br /> ac rutrum odio aliquet
              section.cell
                p Mauris porttitor <br />felis eu leo aliquet<br /> ac rutrum odio aliquet
              section.cell
                p Mauris porttitor <br />felis eu leo aliquet<br /> ac rutrum odio aliquet
This is a common template we can reuse. The line
section#wrapper!= body pulls in content from the page it is used on. Express also supports variables that you pass through to the template. In this case we pass the title variable. If you are coming from Sinatra this will all be familiar to you. If you are not I recommend consulting the Express documentation.CSS in Express
Again Express is agnostic to what you use to generate your CSS - you can use vanilla CSS but for this example I'm using Stylus. This is very similar to Sassand supports variables, mixins, functions and more. I really like it! Here's an example from our stylesheet
body
  font 62.5%/1.5  Helvetica, Arial, "Lucida Grande", "Lucida Sans", Tahoma, Verdana, sans-serif
  text-align center
  background #000

#wrapper
  width 920px
  text-align left
  margin-left auto
  margin-right auto
  background #fff
  padding 20px
  border-bottom-radius(15px)
You'll see that stylus is very terse - you don't need brackets or commas.
Routing in Express
Routing is similar to Sinatra, allowing you to set up RESTful routes.
In this example we setup three routes in app.js
app.get('/', function(req, res){
  res.render('index', {
    title: 'Home'
  });
});

app.get('/about', function(req, res){
  res.render('about', {
    title: 'About'
  });
});

app.get('/contact', function(req, res){
  res.render('contact', {
    title: 'Contact'
  });
});
See the Express documentation for more.
Publishing your site
We've now developed a basic node.js site using express and we want to host it somewhere. Publishing the site to Heroku is free and you can be up and running in no time. You can sign up for an account at Heroku for free and then install the toolbelt.
To make your example node site work with Heroku you must create a file called Procfile in the root of the project. Add the following.
web: node app.js
To make sure Heroku uses the correct versions of node add this to the package.json file
"engines": {
  "node": "0.8.x",
  "npm": "1.2.x"
}
Then you can use the command line tools to create a site on Heroku and publish it.
heroku apps:create
git push heroku master
Easy!
Conclusion
This article has showed how to create a very basic site using node.js and Express. It has introduced a number of things from the node.js ecosystem and showed you how to deploy your app to Nodester.
The strengths of node.js as a technology are not so much in building static websites like this. I encourage you to explore some of the node.js libraries to see what it can do. Particularly for real-time applications node.js is extremely exciting and I think we'll see some great apps built on node.js. Try starting with socket.io for a taste of what to expect.
No comments:
Post a Comment